Showing posts with label planting. Show all posts

Wednesday, October 10, 2012

Can I Get Some Canna?

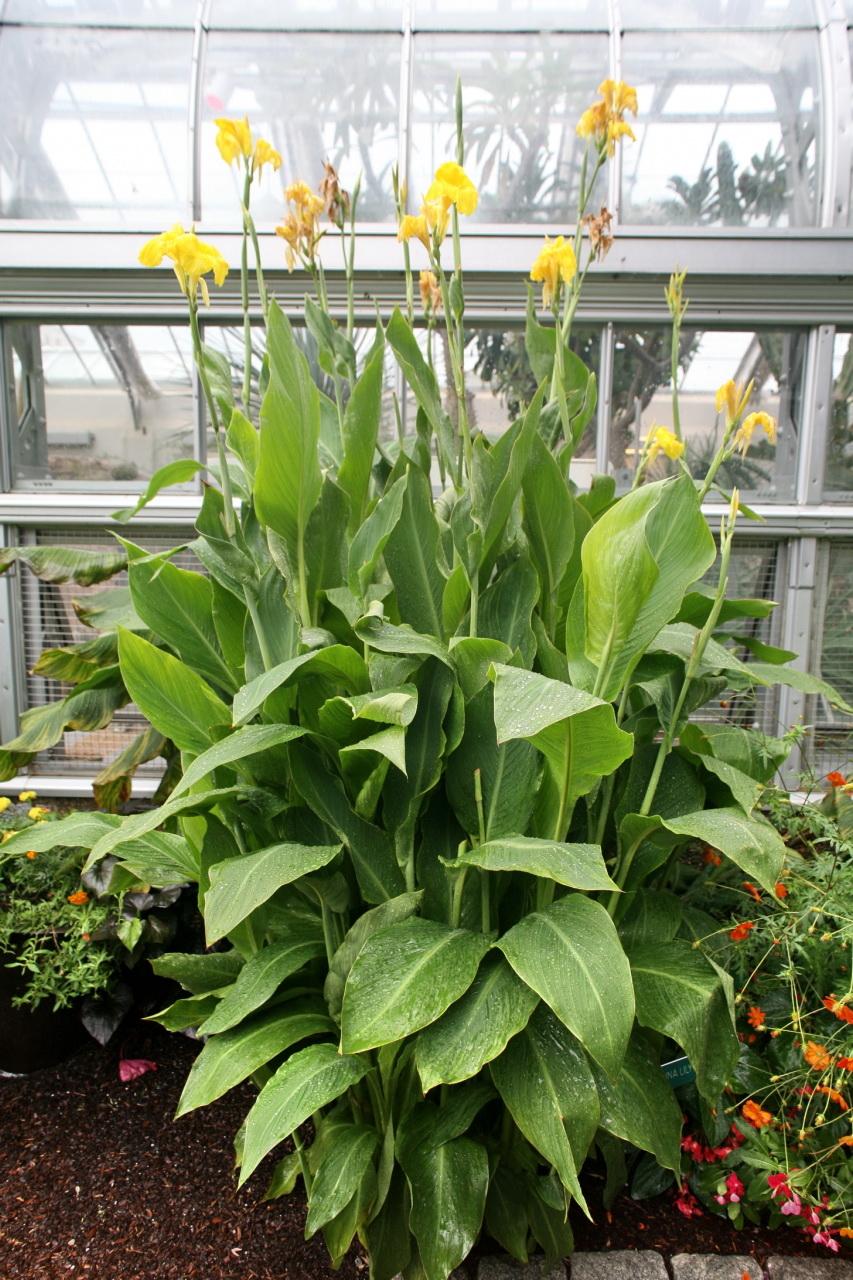
If you've got canna in your yard, which you should, you've definitely noticed that they're going to seed right now. 


If you don't have canna, you should get some seeds from your friends that do. 

Get some seeds, put them in a paper bag or ziplock bag, and put them in the freezer or refrigerator until February.
I know it's a long time away, but I promise to remind you when the time comes!

Here's what you need:


  •  A pair of heavy duty toenail clippers or sandpaper (safer)
  • Clean plastic flower pots (3 or 4 inch).
  • Some multipurpose compost or potting soil.
  • A small stemless glass (for stability reasons).
  • Some canna seeds.
Here's what you do:

  • First get the toenail clippers or sandpaper and sand or chip away at the think black coating of the seed. STOP as soon as you see any white.
  • Next, fill a glass with slightly warm water and soak the seeds for a few days. 
    • OR get a plastic ziplock bag, a paper towel, and your seeds. Wet the paper towel (damp, not dripping), wrap the seeds in the paper towel (making sure to keep them separate), and put it in the bag. DO NOT SEAL the bag. 
  • Once the seeds have germinated, it's time to put them in pots. Keep them in pots until the danger of frost has passed. Then plant them in your yard.
    • It's a good idea to have organic compost mixed with organic peat moss. 
Canna come back every year on their own!.
So once they're set, you don't need to worry about them!
from demandstudios.com
from photobucket.com


Pin It

Monday, August 20, 2012

Fall Vegetable Gardening Seminar

Mobile Botanical Gardens is hosting a 

Fall Vegetable Gardening Seminar 

Saturday, 25 August. 

from mobilebotanicalgardens.org

The cost is $25 for members and 

$35 for non-members (seriously, you're not a member?).


The seminar will cover:
 a planting calendar
recommendations for the Mobile area, 
and a field demonstration (weather permitting).


Pre-registration required. Call 251-342-0555 or email mbg2@bellsouth.net to register.


Pin It

Friday, August 17, 2012

What To Plant Right Now!

It's time to plant for the fall. Along the gulf coast, that means you should be planting the following varieties in August.

Winter Squash

from whatscookingamerica.net


Pumpkins

from expatriotskitchen.blogspot.com


Melons

from foodsubs.com


Cucumbers

from flowerdalenurseries.blogspot.com


Corn

from thedailygreen.com


Pole beans

from gurneys.com


Lima Beans

from southernexposure.com


Beets

from indieogdenutah.com


Carrots

from housebeautiful.com


Collards (and some other leafy greens)

from edenbrothers.com


Pin It

Friday, August 10, 2012

It's Time to Save Your Seeds!

You've worked hard this summer and you've had some beautiful and delicious plants because of it. Don't let all of that work go to waste! Take steps now to harvest and save your seeds for next year. Not only is it a great way to be more involved in your garden (and allow you, if you're brave, to try and create your own varieties), but it will also save you money on seeds next go 'round.

Saving seeds is especially important if you're growing heirloom fruits, vegetables, or flowers. Heirloom plants are growing ever closer to extinction and by you saving (and hopefully sharing) your seeds, you can personally keep that from happening. Some of the varieties we have today have been saved from extinction by single families! You may not feel like a hero, but you can be one by planting, harvesting, and sharing heirloom seeds.


Not all seeds were created equal, so some of them require special care, but for the most part basic steps are the same. Be sure to check one of the guides below before harvesting your seeds. We don't want you to waste your time and not do it properly.

The Basics:

  1. Cut open the vegetable or fruit.
  2. Remove the seeds. 
  3. If the seeds are large enough, clean them with water in a colander or a wire mesh sieve. If they are very small (like tomato seeds), you may need to soak the seeds in water for a few days first, to discourage bacteria. The goal is to remove all plant matter that is not part of the seed.
  4. After the plant matter has been removed, dry the seeds in a towel, paper towel, or on a paper plate for a few days until they are dry. 
  5. Put the dry seeds into a paper container (like the ones you would receive seeds in when you purchase them). Label the container with the type of seed and the date. After seeds are more than one year old, the yield rate drops drastically and you'll have to use many more seeds to achieve the same results.
  6. Finally, put the seeds into the freezer or refrigerator. You need to keep them dry and cold.

Watch this great video from Cliff Middleton about how to save tomato seeds:


Tips!

  • Don't save hybrids! Hybrids are unpredictable and you don't know what you'll get the next year. To be safe, use only heirloom seeds.
  • Save seeds from plants that are ripe, but not overly so. If the plant is over-ripe, the seeds may already be germinating. If the plants are not ripe enough, the seeds won't be ready.
  • Choose the absolute best-of-the-best from your garden to save. These are the ones whose qualities you'll want to pass on to the next generation. If you pass on eating it now, you'll have even better ones to eat next time.
  • If the plant has suffered blight or any other wilting disease and has survived and produced a beautiful fruit or vegetable, it's okay to save seeds from that plant. Don't worry, nature is tough!

Here are some good guides for saving seeds:


How to Save Bean Seeds

How to Save Cucumber Seeds

How to Save Eggplant Seeds

How to Save Lettuce Seeds

How to Save Melon Seeds

How to Save Pepper Seeds

How to Save Pumpkin Seeds

How to Save Summer Squash Seeds

How to Save Tomato Seeds

How to Save Winter Squash Seeds


REMINDER: 


It's time to plant for the fall. Why not try some heirloom seeds from our friends over at Southern Exposure Seed Exchange?
Pin It

Wednesday, May 9, 2012

PTK - Do It Yourself - Sub Irrigation Planter

If you're looking for an interesting way to conserve water and nutrients in your garden, you'd be hard-pressed to find a method cheaper to start and more efficient than sub-irrigation planting.


The idea behind sub-irrigation planting (seepage irrigation) is that water is absorbed upwards from underneath the plant. Excess water can be recycled to water other plants.

Below is a step-by-step guide to help you get started.


Materials Needed:

  • 2 liter empty plastic bottle (any regular soda bottle will do)
  • scissors
  • Moisture wicking fabric (4inches long and 1 inch wide)
  • Potting soil mix (a little peat (sphagnum) moss with some organic fertilizer doesn't hurt either)
Directions:
  1. Cut the 2 liter bottle in half. The bottom half should be 5 inches tall.
  2. In the top half, make puncture holes spaced 1 inch apart. The holes should be 3/8 in diameter and spaced evenly all the way around.
  3. Turn the top half upside down so that the cap part is facing the ground. Remove the cap.
  4. Insert the moisture wicking fabric into the cap hole. Leaving about half of one inch sticking out of the cap hole. The rest of the 4 inches should be inside the top half of the bottle.
  5. Pour about 3 cups of your potting mix into the top half of the bottle, making sure to work the soil around the wicking fabric.
  6. Add about 1.5 inches of water to the bottom half of the bottle (not the half with the soil).
  7. Put the top half of the bottle (soil half) into the bottom half (water side). The bottom half of the bottle should hold the top half without your assistance. 
  8. Plant seeds or seedlings. Use a little water to settle the soil around the new plants.
  9. The wicking fabric should bring the water from the basin and into the soil, so that you only need to add water to the basin once the roots have taken hold.

That's it! Now you have a recycled, water-saving pot. In addition, it's a great conversation piece! Try this out with some fresh herbs like basil, chives, sage, and oregano.


from 2literrocket.com


Too much for you? Stick around. We'll have more great tips for what you can do with other household items coming up soon! Keep planting!
Pin It